Last summer I got a super sweet surprise and got a comment on my blog from my favorite, Bakeralla!!!
Well, last night I got another comment on my blog from one of the ladies at one of my other favorite blogs...eighteen25!!
I should say that it isn't like these awesome people read my measly (and deprived) blog on a daily basis like I do theirs...I did send them emails to let them know what I've been up too and how their lives and ideas have affected mine. But still, it is SO amazing that they took the time out of their busy lives to pop into mine for 5 minutes to leave me a comment.
I'm a happy girl.
Sunday, January 22, 2012

Saturday, January 21, 2012
Fun Frames from the year 2011
I had such a fun time creating my Fun Frames in 2011. It all started after I saw this post from the girls at eighteen25...and I took the idea and made it my own.


I wanted to try to link each picture to the blog post I wrote about it but I am NOT that techie...
My goal for this year, 2012, is to do one every month - even during the summer! Especially being a teacher there isn't a reason not too. Though last year I didn't want to be spending money every month to change the decor (not the Fun Frames) so this year I'll have to get creative!!
At the beginning of the year I made a list of all the words I could think of that were 8 letters or less in length that Jason and I liked for various holidays!
I am already thinking about changing many of the words around this year to give some variety and get more use out of my Cricut! One thing I am not in love with is that our house is SO yellow in hue...you can see behind the pictures that the wall looks like about 5 different colors, and I promise it is not!! I will have to play around with that this year!!
I also am not a fan of how a few of the words turned out in respects to the colors. I might need to do some laying for this year or make bolder choices of colors or more contrasting. In 2011 I went to the store and bought the background papers and then tried to use colors I had at home for the letters but this year I am going to buy them together to make sure they "coordinate". That...or I need to start bulking up on my paper supply ;-)
Here are all my Fun Frames words from 2011...stay tuned for the 2012 versions.


My goal for this year, 2012, is to do one every month - even during the summer! Especially being a teacher there isn't a reason not too. Though last year I didn't want to be spending money every month to change the decor (not the Fun Frames) so this year I'll have to get creative!!
Wednesday, December 28, 2011
NYE Cakepops
My Sister-In-Law has been wanting to learn to make cakepops for a long time so we {my Mom, my SIL and myself} finally found a time for us to get together but it was after Christmas so we decided to make New Years Eve cakepops! We just used up a bunch of leftover candies and sprinkles I already had. I love it when I don't have to go buy anything!!!
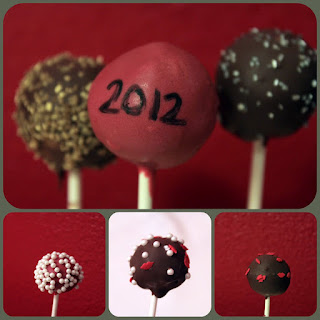
They weren't anything too fancy but it was fun to spend some time together...and it is always fun to teach people to make cakepops!!

They weren't anything too fancy but it was fun to spend some time together...and it is always fun to teach people to make cakepops!!
Sunday, December 25, 2011
Baked Alaska's...
My Mom has been making Baked Alaska's for a while and I'd been dying to try it so I finally did for Christmas. These are most definitely a make-ahead dessert!

I made the cookies two days before I was planning on serving them!
The day before I was planning on serving them I put the ice cream on the cookie and let them freeze overnight.
The morning of Christmas I made the merigne and spooned it on. I got the idea from my Mom from a few years ago to put sprinkles on top to indicate what flavor was inside. The choises were peppermint (red sprinkles) and mint chocolatechip (green sprinkles).
You really could make these with any cookie and any ice cream!!! They are amazing!!


Recipe from Simply the Best by Julie Andersen
Julie is a family friend.
I made the cookies two days before I was planning on serving them!
The day before I was planning on serving them I put the ice cream on the cookie and let them freeze overnight.
The morning of Christmas I made the merigne and spooned it on. I got the idea from my Mom from a few years ago to put sprinkles on top to indicate what flavor was inside. The choises were peppermint (red sprinkles) and mint chocolatechip (green sprinkles).
You really could make these with any cookie and any ice cream!!! They are amazing!!


Tuesday, December 20, 2011
Kids Cakepop Cake 2011
My friend Danielle was gracious enough to host another wonderful Kids Cakepop Camp this Christmas break. The kids had a blast last year and they nicely followed my directions and did exactly what I told them too...this was NOT the case this year but they had a BLAST!!!
These were my ideas for this year...


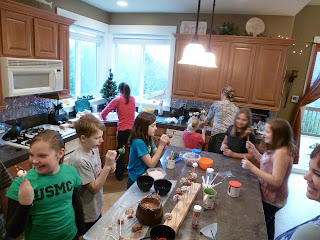


Somehow snowmen turned into chickens...Angry Birds came to the party...and we had quite the time getting the balls to stay on the sticks...but we sure had a good time!!!
As the kids finish the cakepops and they dry the helpers packaged them so I didn't get a bunch of good pictures but you can get the idea...can't wait for next year!!!
These were my ideas for this year...
Ornaments (which is just red and green candy & sprinkles)
Snowmen with earmuffs
Reindeer
Candy cane coated cakepops

I think we had 10 kids and 6 adults...it might have even been more!!

Look at their darling little faces!! They have SO much fun doing this. I think it is now a yearly tradition!!

Blake's "sick" reindeer.

Smiling little reindeer.

The expert packers!!

HOLY CAKEPOPS!!!

The "reindeer" (aka the dog) from The Grinch.
Notice he has one antler out the front of his head. The kids made a lot of them.

Snowman...

Angry bird...

Snoopy..
As the kids finish the cakepops and they dry the helpers packaged them so I didn't get a bunch of good pictures but you can get the idea...can't wait for next year!!!
Monday, December 12, 2011
'upcycling' gift tags...
I've read the term upcycling a few times recently, which to me is basically the same thing as recycling, but I'll go with trends...
Last year I kept all my old Christmas cards and forgot why I did, until at this very moment as I type this blog post - which is too late for it's orinigal intent. What I was going to do was hole punch them and bind them together with a circle ring and put the year on the front. Then each year we would have a collection of cards from years past...I got the idea from ThePoeFam blog but I cannot find where the post is that contains pictures.
Well, now that that isn't going to happen...here is what I did. The idea actually came from my Mom :)
I took the cards from last year and cut up the ones that were small enough or cute enough to be 'upcycled' into new gift tags. It so happened that I am out of Christmas gift tags and didn't want to go to the store!
I used about 8 cards total...here's a few of them.


Last year I kept all my old Christmas cards and forgot why I did, until at this very moment as I type this blog post - which is too late for it's orinigal intent. What I was going to do was hole punch them and bind them together with a circle ring and put the year on the front. Then each year we would have a collection of cards from years past...I got the idea from ThePoeFam blog but I cannot find where the post is that contains pictures.
Well, now that that isn't going to happen...here is what I did. The idea actually came from my Mom :)
I took the cards from last year and cut up the ones that were small enough or cute enough to be 'upcycled' into new gift tags. It so happened that I am out of Christmas gift tags and didn't want to go to the store!
I used about 8 cards total...here's a few of them.

This tag is made from two cards {Thanks to Adrienne Black & The Hubert's}. I took the little mug that was on the inside of a picure card and first just made a plain tag. Then I was looking at the photo card from my friend Jen and loved the plaid print! I trimmed down the card and glued it to the plaid. It made a cute little card to send to my cute little (okay, she's taller but younger) cousin :)

Here is two more. The top Santa tag is from a card from my friend Leena and the bottom tree is from my friend Kalli.
I have about 6 more cards that I've already done and plans to make the rest of my gift tags from cardstock that I already have around the house.
Sunday, December 11, 2011
button wreath {first pinterest inspired craft}
Have you heard of Pinterest?? If not, it might be best for your time management skills if you don't click on that link... If so, you know what I am talking about!
* Note to self. Keep all parts of the project until you are done with the blog post. I cannot remember or find what kinds of buttons or paper I used. I got everything I needed at JoAnn Fabrics in December 2011.
Last week I made my first Pinterest inspired craft...You can see the original inspiration here.

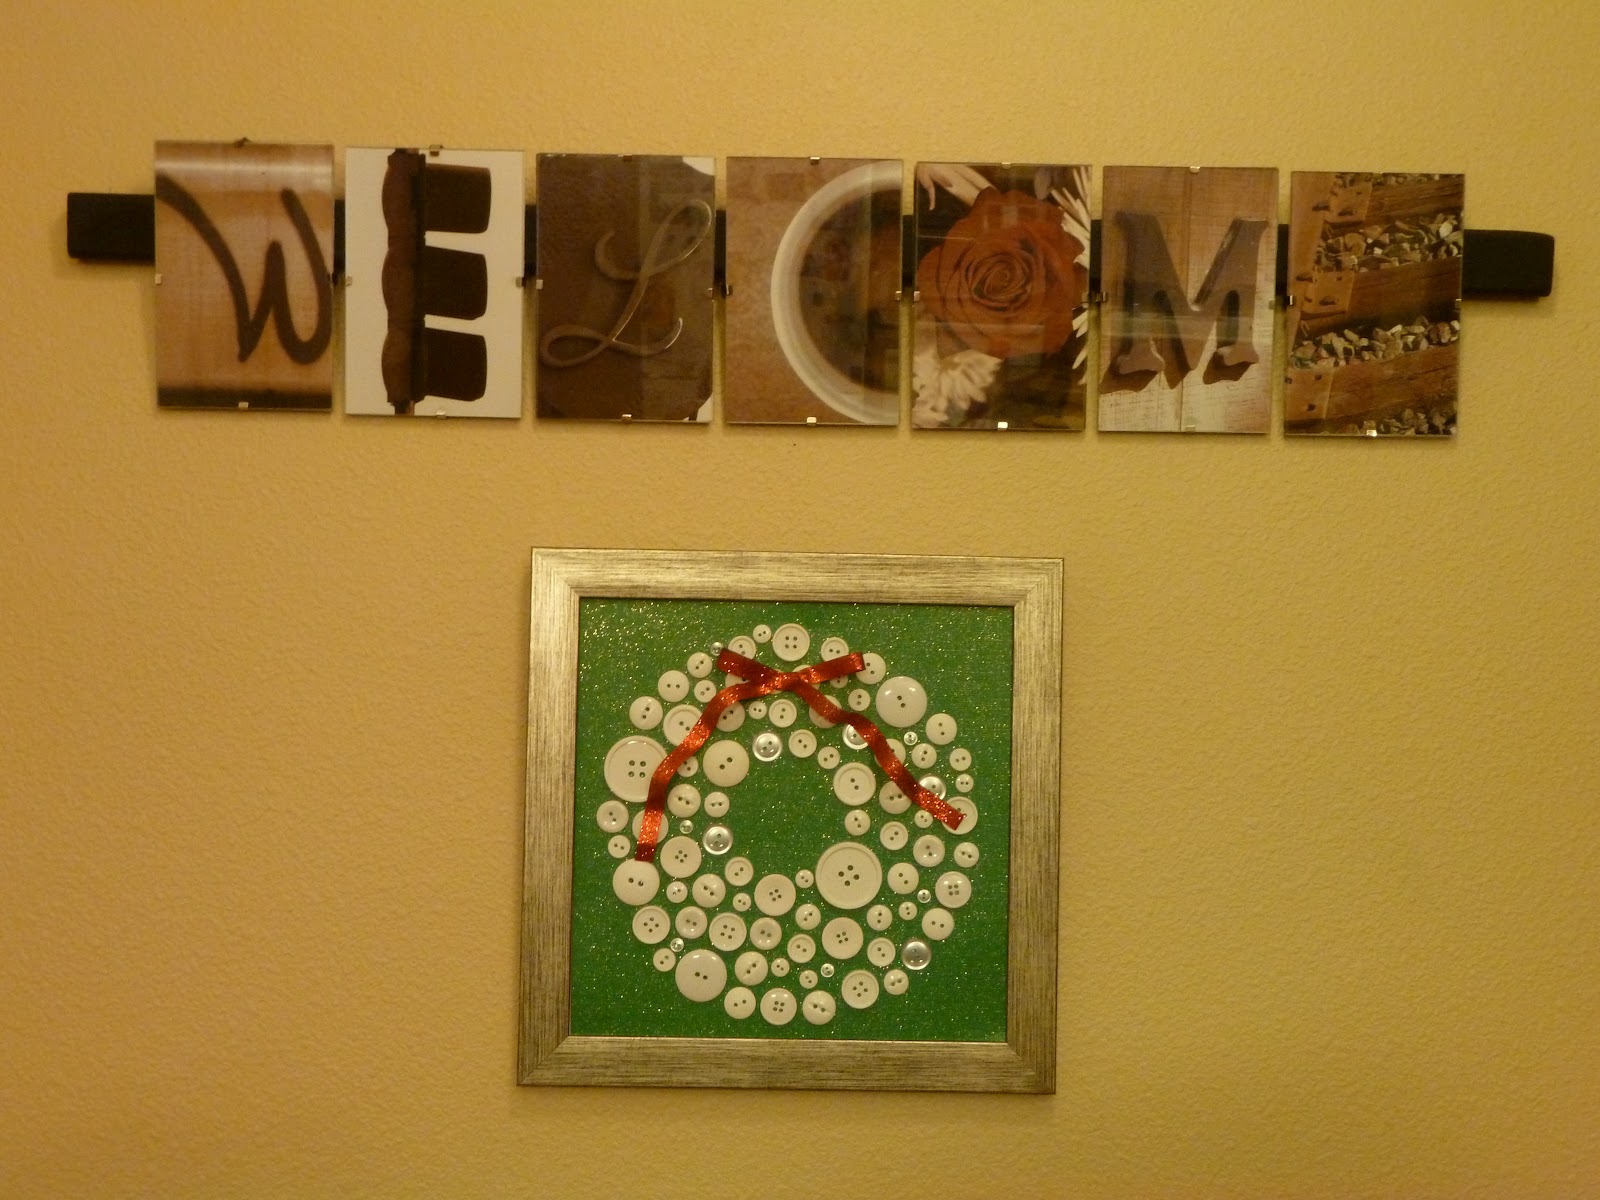
Isn't it cute?!?! The original sewed the buttons on which is a super good idea. I am not that skilled nor do I have that much patients. SO instead of fabric and thread I used paper and hot glue.
Here is the jist of how I pulled this off...


2nd - I cut the paper after a few samples from some extra light green paper. I only had one glittery paper and needed to make it perfect!


6th & 7th - I first placed the buttons in a random order trying to make sure the bigger ones were farther apart. I used mostly white buttons from this black/white button pack as well as 6 strips of buttons, also from JoAnn Fabrics.

I added the red glittery ribbon and had to end up sticky-tacking it on because it wasn't staying. I didn't want it to be permanent so I didn't use hot glue. I know when I pack it away this winter I'm going to have to redo the bow next year!
I would say all-in-all it took me about 45 minutes...hot gluing buttons takes a long time!!
* Note to self. Keep all parts of the project until you are done with the blog post. I cannot remember or find what kinds of buttons or paper I used. I got everything I needed at JoAnn Fabrics in December 2011.
Last week I made my first Pinterest inspired craft...You can see the original inspiration here.

Isn't it cute?!?! The original sewed the buttons on which is a super good idea. I am not that skilled nor do I have that much patients. SO instead of fabric and thread I used paper and hot glue.
Here is the jist of how I pulled this off...

1st - I bought this home decor picture...but really all I wanted with the shiny silver frame!!

2nd - I cut the paper after a few samples from some extra light green paper. I only had one glittery paper and needed to make it perfect!

3rd - 5th - I used a few items from around the house (seasoning and Christmas bowl) to help me make an 'as nearly as you can while using buttons' circle.

6th & 7th - I first placed the buttons in a random order trying to make sure the bigger ones were farther apart. I used mostly white buttons from this black/white button pack as well as 6 strips of buttons, also from JoAnn Fabrics.
I added the red glittery ribbon and had to end up sticky-tacking it on because it wasn't staying. I didn't want it to be permanent so I didn't use hot glue. I know when I pack it away this winter I'm going to have to redo the bow next year!
I would say all-in-all it took me about 45 minutes...hot gluing buttons takes a long time!!
Subscribe to:
Posts (Atom)