Monday, March 29, 2010

(first) reusable bag...

Another project down. I really am starting to get the hang of this sewing thing...at least the basics! I had some fabric left over from the first project (curtains) I really did all by myself. So instead of throwing it away I put it to good use! My Mom helped with the ideas and a quick tutorial but i did all the work myself.


sewing the corners. this helps the bag "sit flat"


here goes nothing...this was the hardest part of the bag and once i understood the concept...it was SO easy!


Voila!!! A handmade reusable bag.


Very spacious...it will fit lots of groceries.


reinforced the handles a bit...and thought of this idea all on my own. this was my first time sewing continuously...meaning at every corner i would switch the line i was sewing. this involves keeping the needle in the fabric while picking up the foot and roatating the fabric.

Wednesday, March 10, 2010

a project YEARS in the making...

It all started a few years ago when I bought some wall decor. This specific peice started the theme of my kitchen...starwberries!!!


This peice of wall decor is still in good use in my house...along with many more additions over the years! Then one day, at least 2 years ago, I went into Michael's in Moscow, Idaho and found these...


So you may be asking yourself how I know it is AT LEAST 2 years...well that is the minimum amount of time I've been away from Idaho :) Back then when I bought the ribbon I had the foreshadowing (I guess) to see what I would use it for. I had always wanted to sew it onto some dish towels but only recieved a sewing machine a year and a half ago. I guess this project was just meant to be. Also, it should be noted that I did not lose the ribbon in the last 2 years...through 3 moves :)

It really was one of the easiest projects to do so don't be surprised if you get some :) You just take an ordinary dish cloth - it could be colored if you'd like - and sew the ribbon on the end sewing both the top and the bottom of the ribbon to the towel. And voila! The first ribbon took me about 10 minutes to do, the next sides only took me a few minutes! MAYBE a half hour of work total if you include threading the bobbin, threading the machine, and all the sewing to do 2 towels with ribbon on both ends!


trying to keep it straight...

double wrapping the ends under - to avoid fraying :)


towel in action...

so simple!

in one night...

According to my own post on Facebook I started my project for tonight "4 hours ago." I made curtains for "the brown room" which I guess I can now call my craft room as I have had multiple crafting sessions in there :) I always seem to get the urge (energy) to sew in the evening around 6 ot 7 - when TV isn't too good and Jason isn't usually home. The problem was that my craft room had no blinds and looks out into our backyard...which was dark...and scary. That is, until tonight! That is right. I made 2 panels to form one window curtain in-one-night!!! I'm proud again, I must admit. This project involved a little bit more than my last curtain project. Mainly because I was making 2 curtains to fit in one window so I had to measure everything to make sure it would look good together! I think I did a mighty good job! I am a big fan of the "ruffle at the top" look for a few reasons: 1) it lets less light it because it fills in the gap at the top between the window frame and the curtain rod. 2) it allows for a little bit of room for error as it is meant to look scrunched. Those are two solid reasons and good enough for me. Jason has planned for me to make curtains for the bedroom using this technique but also adding the extra good (but positive outcome) of blackout fabric. We'll see when I get around to that one... As for now - the pictures of my newest project.

hemmed the sides first.


folded over 2 cm. i used cm because that was the side that had an "even" measurement point to look at on the tape. i am not that smart...heehee.


folded it over 3 1/2 inches. the 2cm was folded under.


the pin right now is holding the folded under 2 cm in place while i hemmed it up. i did this thank to the advise from my mom. if you don't turn the fabric under and if you leave the "raw" edge exposed it will fray when you wash it. See Mom...I do listen :)


hemming the rod pocket. the space on the bottom (left) will be where the curtain rod will slip into, leaving the 1 1/2 on the top (right) to "scrunch"


it is quite the set up i have. a few days back jason brought the tv and cable in here...maybe that is why i've been getting so much done. though i found out tonight sewing and watching the news don't mix because you can't hear the tv...oh, and my ever present helper. he loves the sewing room - mainly because he loves string and there is plenty of that around!


sewing away!


before


after. i still need to hem the bottom but i'm only going to hem it up less than an inch so it won't look much different!

what to do next...i want to try to make some kind of bag...we'll see :) i'll keep you posted!

Monday, March 1, 2010

apron a la annie...

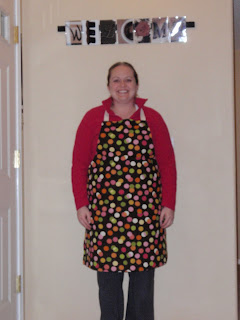
I must say, I am proud of myself. I made an apron all by myself. For all you crafty people out there that might not be a big deal but for me its a great accomplishment. Oh, and I did it with only about 20 minutes of a "break down" on one piece. Pretty good all in all. I'll let the pictures explain the rest!!! Don't be surprised if in the next year people start getting homemade presents from me!

making the pattern. notice my helper...???


pins galore! i was so afraid of it moving too much while i was cutting...


please ignore the pj's. focus on the apron.


:) so proud!


sewing on a round edge :)


finished product...now to figure out who to give it too!!!

fabric: 1 3/8 yard = $4.99
tie fabric: $2.99
brown thread: $1.50 (to be reused again and again)
I used a 40% off coupon on every purchase towards the supplies for this apron. Thank you JoAnn's Fabric!

so approximately $10 for a gift. not to shabby!!! and next time i'll be even more efficient at it!

ps. thanks Mom...for all those times you tried to get me to sew. sorry it took me so long but better late then never...right???

pps. i know there is no pocket. it looked funny. plus really...what do you use the pocket on an apron for anyways???