Sunday, January 2, 2011

Dinner - Chicken Chow Mein

You know those dinners that just bring you back to your childhood? Well, tonight I had one of those moments! We've recently acquired a recipe from my Mom that she used to make often. My Mom, and Dad for that matter, are very good cooks. They happened to have had 2 very picky children. And not only that, the children (my brother and myself) didn't like the same picky things. I was vanilla, he was chocolate. I was pancakes, he was waffles. We had few things we liked and mostly all of them consisted of rice and chicken. The three main meals we ate as children were: Chicken Rice-A-Roni with chicken breasts, Chicken & Rice (recipe to come), and Chicken Chow Mein.

My husband decided it was about time to try this recipe he's heard so much about over the years and let me tell you, it brought me back. I could picture the pan my Mom makes this in and the kitchen I ate it in all those years growing up. But it was even more special tonight because now I have a new memory with my husband but can still relive those old ones to. That's what I want this year, 2011, to be for me. Making memories, saying thanks, being a good friend/wife/family member, and being in the moment while reflecting on the past and hoping for the future. I don't know where or why this rant started - maybe its because of this meal that reminded me where I've come from and where I want to go!
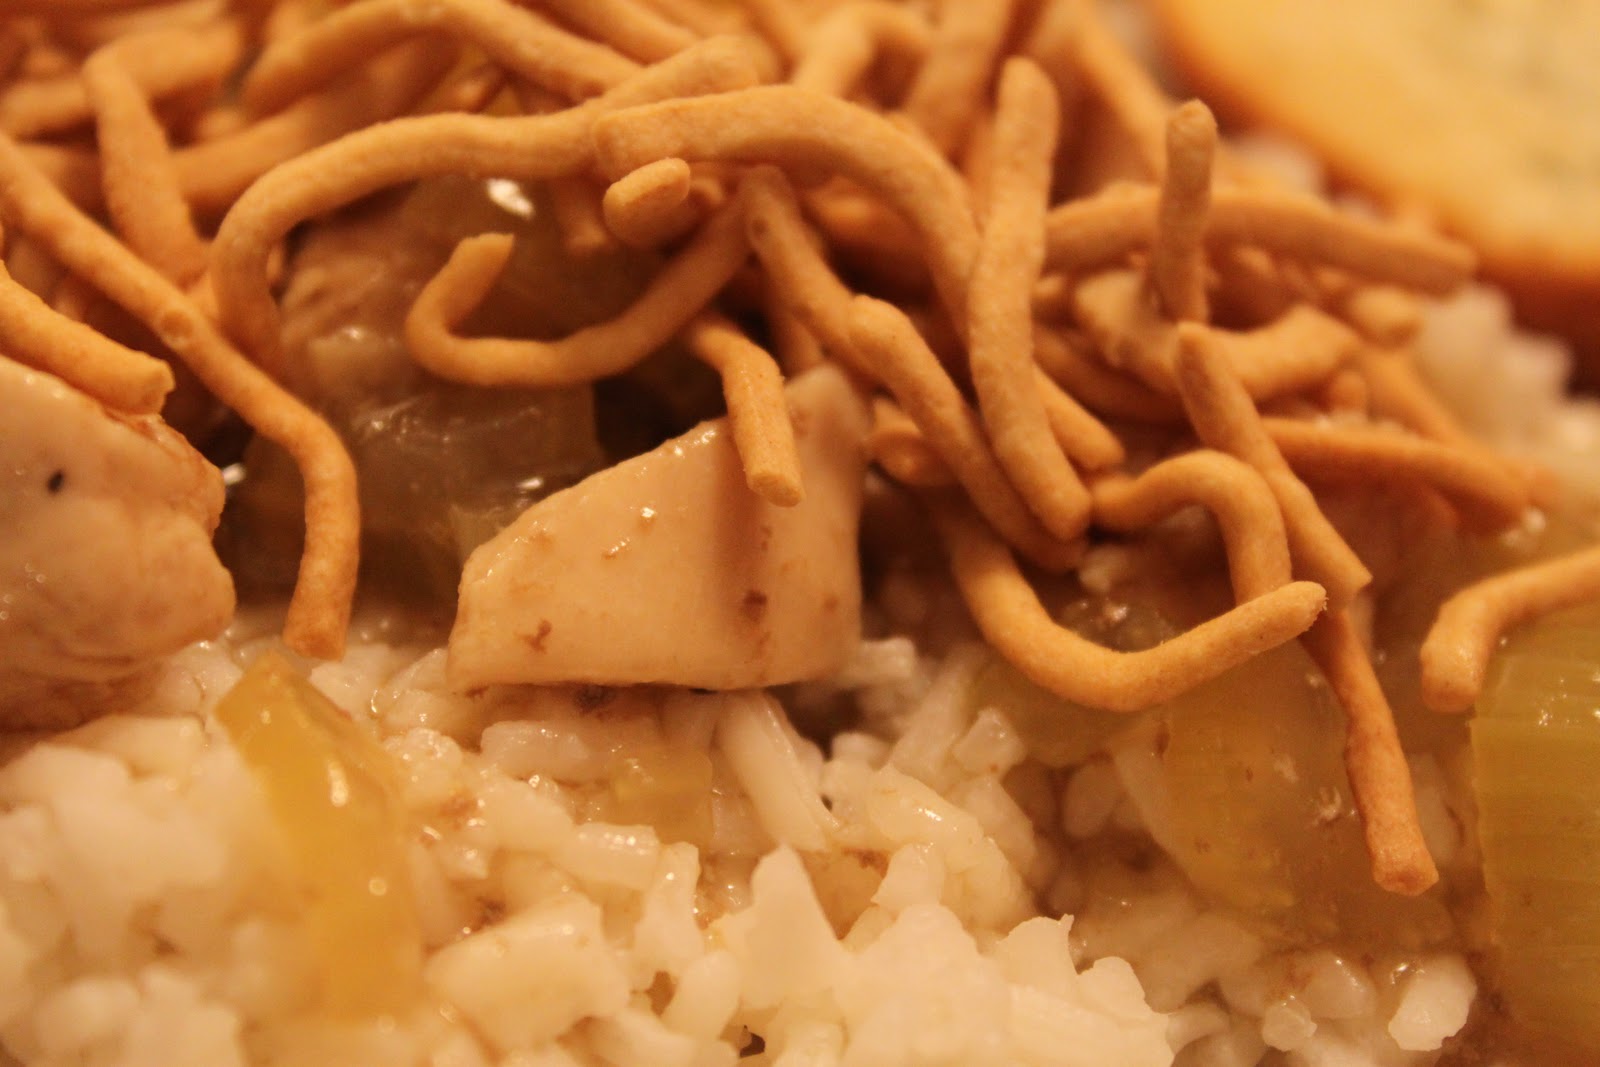


Chicken Chow Mein
Send to your printer!

3 TBSP Butter
4 TBSP Chopped Onion
3 C. Chopped Celery
2 C. Diced Chicken
1 tsp salt
3 C. Chicken Broth
1 TBSP Sugar or Honey
¼ C. Soy Sauce

Melt butter in large frying pan. Saute the onions until tender.
Add celery, cover and simmer for 15 minutes.
Add the remaining ingredients. Cooke about 15 minutes.

Blend 4 TBSP corn starch with 6 TBSP water. Blend into above mixture and cook until thickened - stirring constantly.

Serve over the top of rice. Garnish with Chow Mein noodles.

*Modification. You can add 3 C. Chopped carrots in when you add the celery  and chicken.
PS. Please be kind...this is my first time EVER using Google Docs so I hope it goes okay.

Tuesday, December 28, 2010

Christmas Candy Cane Cake!

I am in love with this cake. Though I love chocolate and peppermint!! After my trial run I knew I wanted to make this for dinner with the McLean family - otherwise knows as Christmas Part 4! Even Conor, who is a self proclaimed anti-chocolate person, liked this cake...and that makes me happy!

This cake is from Annie's Eats. The only things I did different were: I didn't have espresso powder so I just used coffee and I didn't sprinkle the cake with crushed up peppermint...though I wish I would have! We were just out of candy canes!

So pretty and so yummy!


I hear peppermint!

Wednesday, December 22, 2010

Christmas cakepop camp #2 (the kid version)...

Seeing as I don't have kids of my own yet...that must explain what I was thinking when I decided to teach my friends and their kids to make cakepops! All kidding aside, the kids and mom's did wonderfully!! I even got asked by one of them if I would do a cakepop birthday party...so it must have been a success. We all gathered at Danielle's gorgeous house to have a blast.

I was much more cautious with how I planned this one than I was with the one from the previous day...seeing as there were kids aged 7 - 14 involved. We (Sabrina and I) set up 3 stations for 3 different cakepops which was the best idea. The family groups each rotated with their mom's through each station and after about 20 minutes switched. After each group had gone through each station the kids really had a handle on it and could go where ever they wanted.

Crumbling on the counter. Don't worry, it's her house.

Discussing chocolate :)

Rolling into balls.
This was the most challenging part for the kids because they had a hard time making them tight enough.

Busy hands!

Haha. I think there were 4 kids working on this batch.

Once a teacher, always a teacher.
Explaining to dip it like a joy stick. Those kids have NO idea what a joy stick is. Next time I'll bring an XBOX remote to demonstrate...

More teaching.

Oh sisters...making snowmen.

Christmas trees. We really struggled with this green Wilton melting candy.

Regular cakepops disguised as The "ornament" station.

The Wing's making snowmen!

Sabrina, she didn't even make one cakepop. She just packaged them all. She is a great friend!

A few things I learned...
- Kids can be better at things than adults
- Take more pictures
- Bring an assistant ;-)
- At the time it seemed like a lot for each family to have a batch (40-45) of cakepops but in the end...I think everyone was happy with how much they got to go home with. And I still have some in my freezer....waiting for me to get motivated enough to make more.
- With kids, your sprinkles WILL get mixed...even if the adults watching over them are teachers...its just inevitable.
- I love kids, my friends, Christmas break, and cakepops.

Christmas cakepop camp #1...

I had decided a while ago that I wanted to teach people to make cakepops. Secretly, I want people to make them and for me to eat them...without having made them. Sure, they are cute but they are time consuming! I lined up some of my work friends (and some of their kiddos) to teach over Christmas break. We did it before Christmas so that people would have them to give away as treats to neighbors or family members...so keep a few for themselves :)

I should mention that originally I was supposed to do this one of the two days with my old college room mate but she had some unfortunately and untimely deaths in her family...love you Meggers and we'll make cakepops soon!

I really had a blast teaching people, I mean - I am a teacher after all!

The first day (which was supposed to be with Megan) ended up being with 4/5 of the 4th grade team members at my school. Laurie was gracious enough to offer her kitchen up. Thanks Laurie!

4/5th of the 4th grade team!

Smiling Snowmen.

My favorite - made by me :)

Me. I chopped my hair off 2 days later, I kind of miss it now looking back.

The wrapper bee's.
Norma is in the middle. She is Laurie's (on the right) Mom and also volunteers in my classroom 2 days a week to help with my kiddos!

Santa hats. Very time consuming.

My new best friend (sorry Sabrina!)

My masterpiece!!
Peppermint cake with dipped in chocolate coating and sprinkled (heavily) with crushed up candy cane! OOOHHH they were SO good!

Friday, December 17, 2010

Christmas Candy Cane Cake - trial run...

I knew at some point during our 6 (yes, six) Christmas festivity nights I'd be making a cake but I didn't know what one. Then I stumbled upon it...annies-eats and her peppermint cake and I knew I HAD to make it!! I always get warry when trying new cakes from scratch so I wanted to do a trial run...I knew no one would mind. My trial runs usually get passed out to my friends and Jason's co-workers.

The post from Annie's Eats had it in a whole cake but it was fun to make into gift sized portions!

I decided to bake and deliver them in these Reynold's star shaped pans. I've had them in the cupboard for years and never used them...and they were just different from cupcake tins :)

I also made a few rectangluar cake ones!

They were SO good and I will definitely make them for Christmas time!


Sunday, December 12, 2010

closet conversion - the cost...

From the time I started this closet conversion I wanted to calculate the cost so I kept all the receipts to review later. Well, later is now. Really, I think we did pretty good. I had been looking at items like this from Ikea or this system from at Michaels and the benefits would have been that I could take them with me when we're gone and who knows, one day that might be what I have. Though neither would have given me exactly what I wanted. But for now, this really worked for us for many reasons. I wanted a permanent space (nails make it permanent), I wanted a large space, we wanted to save money and Jason wanted a project!

So here is the rundown of the costs. We had the nails, screws, and green paint left over from various other projects.

$ 25.00 - white board. used for desk and one shelf.
$ 14.35 - trim for around peg board. 25.17 ft @ $.57/ft
$   7.42 - 3/4 in. square trim. 13.25 ft @ $.56/ft
$ 12.48 - primed baseboard. 2 @ $6.25 each
$   2.94 - brown paint. Use sample size in exact color as wall.
$   7.50 - pegboard. Whole board was $15.22, used half for this project.
$ 69.09


The trim for around the pegboard is what you can see in the pictures that is painted brown. We had to buy more because Jason mis-cut some of the pieces... The 3/4 square trim we used to back the pegboard so that hooks would fit back there and it is also the support underneath the shelf in the nook and there will be enough for another shelf someday.

All in all I am really proud of my husband! He did such a nice job and really took his time to help me figure this all out. I would say I have used it about 4 times a week since I've had it, though funny enough I haven't scrapbooked on it yet...that will come :-)

Cookie Bake & Exchange...

Myself and a few of my friends from work had been talking about doing a cookie exchange, problem was no one was really in the mood to make a few dozen cookies in their own kitchen! We decided to switch it up and bit...we had everyone make their cookie batter at their house and then come to school (we're teachers - so this was a normal meet-up spot) and bake them and chit chat! It was a fun but oddly hectic event. I decided to make my absolute favorite cookie - Russian Teacakes. Turns out, many other people liked them too and were happy to have them on their plates.

Another fun part of this was getting everyone else's recipes! This was a great way to get a variety of cookies. While I know everyone can not bake all their cookies and their friends cookies in one place (schools happen to have lots of big ovens!) there are many other ways to have a cookie exchange!

huge ovens!

my best friend baking!

me. with my caddywhompus eye... with my Russian Teacakes

cookies!

more cookies!


what a fun looking plate!!


Thanks to my wedding acquaintance Jill for telling me about picnik which lets you edit and arrange photos...I am SUPER excited to put this to use and hopefully get Photoshop for my upcoming birthday!