Since I've been sick since September {for reals} I have done zero baking. Like, none. I've thought about it and then I generally took a nap and some more medicine. This week the antibiotics are finally working and the zest for baking is BACK. I think the people at my husband's work are excited :)
I was craving peanut butter and chocolate - which is a common thing in my life. That is an amazing combination!! I went to my Martha Stewart Cookies book that I got from my BIL for Christmas last year and had yet to crack open. I was thumbing through hoping to find something that I had all the ingredients for, since I did not want to go to the store. I pretty much love the table of contents in this book because it is pictures!! My eyes fell on the whoopie pie and I was sold!!
I followed the recipe, which can be found here, exactly. When I make them again, because there will be a next time, I will make the filling a bit sweeter!
I was a bit worried since I'd never made them before but it all turned out great. Martha's books really do have some stellar directions in them!! PLEASE ignore the horrible pictures...the lighting in our house is SO yellow...and I'm hoping Santa will bring me this for Christmas to aide in that!!
My mom always tried to teach me how to bake, sew, and cook. Now I'm finally putting all those skills to use and learning some new ones along the way :) This blog is meant to document my adventures in the arts of homemaking.
Thursday, December 8, 2011
Thursday, December 1, 2011
Fun Frames ~ JOLLY
My house didn't get as crazy-decorated as I'd had liked for Christmas - being sick will do that to you!! I was on the tailend of my 3 month long cold when Christmas decorating rolled around. I have big plans for next year...which WILL include my snow village which did not make an appearance this year!!
The Fun Frames words for this holiday season were tough to figure out. We aren't religious so anything pertaining to religion was out. Though, thankfully, that still leaves plenty of other options!! My montra this season was "I believe in the spirit/magic of Santa" because for us, he is one reason to celebrate the season. And who doesn't like getting a present from Santa under the tree :)
JOLLY seemed like the fitting word. I LOVE how the red and white swirls went nicely with the dark green I picked out from JoAnn's.
The Fun Frames words for this holiday season were tough to figure out. We aren't religious so anything pertaining to religion was out. Though, thankfully, that still leaves plenty of other options!! My montra this season was "I believe in the spirit/magic of Santa" because for us, he is one reason to celebrate the season. And who doesn't like getting a present from Santa under the tree :)
JOLLY seemed like the fitting word. I LOVE how the red and white swirls went nicely with the dark green I picked out from JoAnn's.
Fun Frames 2011
above the TB
Subway art from eighteen25
The mantle.
I love our candels. The Santa's are painted by me when I was a kid.
The tradition of "teddy bear in the stocking"...I love this tradition my hubby started for me.
Shelf in the kitchen.
Our stocking. Lovingly made by my wonderful Grandma Cole...
The whole mantle.
Saturday, November 26, 2011
DB Creamy PB Fudge...
...also known as Denise Batten's Creamy Peanut Butter Fudge.
I have been eating this recipe for 3 years but this is the first time I've made it. I've also wanted this recipe for many years and have been told it was a "family secret" one year and then told I'd be given it the next year (but never was). I did come by it honestly - but not from the person who makes it. I was given it by another friend who saw my post on facebook about wanting to make a good PB Fudge that someone had already tested because lets fact it - there are SO many recipes on the Internet...I wanted to spend my money and time on something I knew was delicious...and this.is.it!!!
This fudge is not the "hard" fudge - hence the creamy word in the title.
DB Creamy PB Fudge
DB Creamy PB Fudge ~ Printer Friendly Edition
6 Cups Sugar
1 12oz can evaporate milk
4 sticks margarine (Imperial)
2 7 oz. jars marshmallow cream
1 28 oz. jar Skippy Peanut Butter
2 tsp vanilla extract
On medium heat put margarine, sugar, and evaporated milk in a 6 quart pan. Stir occasionally to keep from sticking and allow for even mixing. When mixture comes to a full boil, set a timer for 5 minutes, and continuously stir while the mixture continues to boil. When the timer goes off take the pot off the burner. Add vanilla. Stir in marshmallow creme until incorporated. Add in peanut butter and stir until it is completely mixed. Pour into foil lined pans coated with non-stick cooking spray. Let sit overnight, or put in the refrigerator for a couple of hours. Remove fudge and foil from the pan and cut into squares. For creamy fridge, let it sit on the counter, not in the fridge.
Wondering about the cup in the middle of the collage?? One of Jason's coworkers called it "mood changer fudge". It is creamy, smooth, and amazing...now to get the consistency right!
**This fudge was amazingly delicious but I must have done something a tad wrong. I remember it being pretty creamy when she made it but mine was like melting and slipping through my fingers...which, don't get me wrong, was still amazing!!
I have been eating this recipe for 3 years but this is the first time I've made it. I've also wanted this recipe for many years and have been told it was a "family secret" one year and then told I'd be given it the next year (but never was). I did come by it honestly - but not from the person who makes it. I was given it by another friend who saw my post on facebook about wanting to make a good PB Fudge that someone had already tested because lets fact it - there are SO many recipes on the Internet...I wanted to spend my money and time on something I knew was delicious...and this.is.it!!!
This fudge is not the "hard" fudge - hence the creamy word in the title.
DB Creamy PB Fudge
DB Creamy PB Fudge ~ Printer Friendly Edition
6 Cups Sugar
1 12oz can evaporate milk
4 sticks margarine (Imperial)
2 7 oz. jars marshmallow cream
1 28 oz. jar Skippy Peanut Butter
2 tsp vanilla extract
On medium heat put margarine, sugar, and evaporated milk in a 6 quart pan. Stir occasionally to keep from sticking and allow for even mixing. When mixture comes to a full boil, set a timer for 5 minutes, and continuously stir while the mixture continues to boil. When the timer goes off take the pot off the burner. Add vanilla. Stir in marshmallow creme until incorporated. Add in peanut butter and stir until it is completely mixed. Pour into foil lined pans coated with non-stick cooking spray. Let sit overnight, or put in the refrigerator for a couple of hours. Remove fudge and foil from the pan and cut into squares. For creamy fridge, let it sit on the counter, not in the fridge.
Wondering about the cup in the middle of the collage?? One of Jason's coworkers called it "mood changer fudge". It is creamy, smooth, and amazing...now to get the consistency right!
**This fudge was amazingly delicious but I must have done something a tad wrong. I remember it being pretty creamy when she made it but mine was like melting and slipping through my fingers...which, don't get me wrong, was still amazing!!
Thursday, November 24, 2011
Homemade hot cocoa & Bath Salts ~ After Thanksgiving Craft
This is the 3rd year of our "new" tradition of making a craft after Thanksgiving dinner...though this year my husband didn't have to help with decorations - becuase he had to go back to work :( For a flash back go here and take a look at the last 2 years of creativity!
This year we stepped it up and we did two projects. I really like doing these projects for the following reasons...
- Spending time with my Mom
- Being creative
- Getting a few gifts out of the way
It is nice to have a few gifts laying around the house. Some of these I already have people in mind for...some I don't. I also want to figure out about how much per gift we spent...because I bet it really wasn't much...more on that in a different post!
This year my Mom gather the ingredients for one project and I the other.
Bath Soaking Salts - Mom's Craft
There are SO many options for bath salts out there. All of the recipies are pretty similar. We decided to go for a bath soak which is a dry bath salt. You can also make bath scrub which is the 'wet' kind...I still might try some of those!!
We made two varieties: tea tree and ginger. For the tea tree we used essential oil and for the ginger we (to my surprise) used actual ginger that we smashed and took the oil out!
For the base mixture we mixed together 4 cups of Ebsom Salt, 1 cup of Sea Salt, 1/4 cup baking soda to make one batch. We then added about 5 drops of tea tree oil to one batch and about 1/2 a stock worth of ginger oil to the other batch. We then packaged them in glass containers my Mom got at the Dollar Store, tied them with some tulle, and added a cute little card that was actually made from cutting out pictures from Christmas cards my parents got last year...yeah for recycling (and free)!
This year we stepped it up and we did two projects. I really like doing these projects for the following reasons...
- Spending time with my Mom
- Being creative
- Getting a few gifts out of the way
It is nice to have a few gifts laying around the house. Some of these I already have people in mind for...some I don't. I also want to figure out about how much per gift we spent...because I bet it really wasn't much...more on that in a different post!
This year my Mom gather the ingredients for one project and I the other.
Bath Soaking Salts - Mom's Craft
There are SO many options for bath salts out there. All of the recipies are pretty similar. We decided to go for a bath soak which is a dry bath salt. You can also make bath scrub which is the 'wet' kind...I still might try some of those!!
We made two varieties: tea tree and ginger. For the tea tree we used essential oil and for the ginger we (to my surprise) used actual ginger that we smashed and took the oil out!
For the base mixture we mixed together 4 cups of Ebsom Salt, 1 cup of Sea Salt, 1/4 cup baking soda to make one batch. We then added about 5 drops of tea tree oil to one batch and about 1/2 a stock worth of ginger oil to the other batch. We then packaged them in glass containers my Mom got at the Dollar Store, tied them with some tulle, and added a cute little card that was actually made from cutting out pictures from Christmas cards my parents got last year...yeah for recycling (and free)!
Mom cutting the ginger...
Making labels/tags out of old Christmas Cards!
COST ANALYSIS of 1 gift. Total - less than $5 out of pocket
Glass container - $1 @ Dollar Store
Epsom Salt - $4 - we used 2 3lb bags
Baking Soda & Salt - already on hand
Essential Oil - about $10 per container. We used 5 drops...
Tulle - already on hand
Tags - made out of recycled Christmas cards
Homemade Hot Cocoa Mix - Annie's Craft
I found a recipe that seemed really good - many different ingredients - here. We followed the directions for making the powder but we put our own little spin on another indgredient! As an after thought I realized that I hadn't even tasted this before we made it...I confirmed today it was delicious!!
Ingredients you will need the below ingredients for 1 batch.
- 2 cups nonfat dry milk powder
- 3/4 cup sugar
- 1/2 cup unsweetened cocoa
- 1/2 cup mini semisweet chocolate chips
- 1/2 cup powdered nondairy creamer
- 1/8 teaspoon salt
The above recipe made about 4 baggies, measured 1 Cup each. We added a hanfull or two of mini peppermint marshmellows...yummy!! We tied wth some rickrak and cute gift tag I made.
Wednesday, November 23, 2011
Fun Frames ~ gobble {gobble}
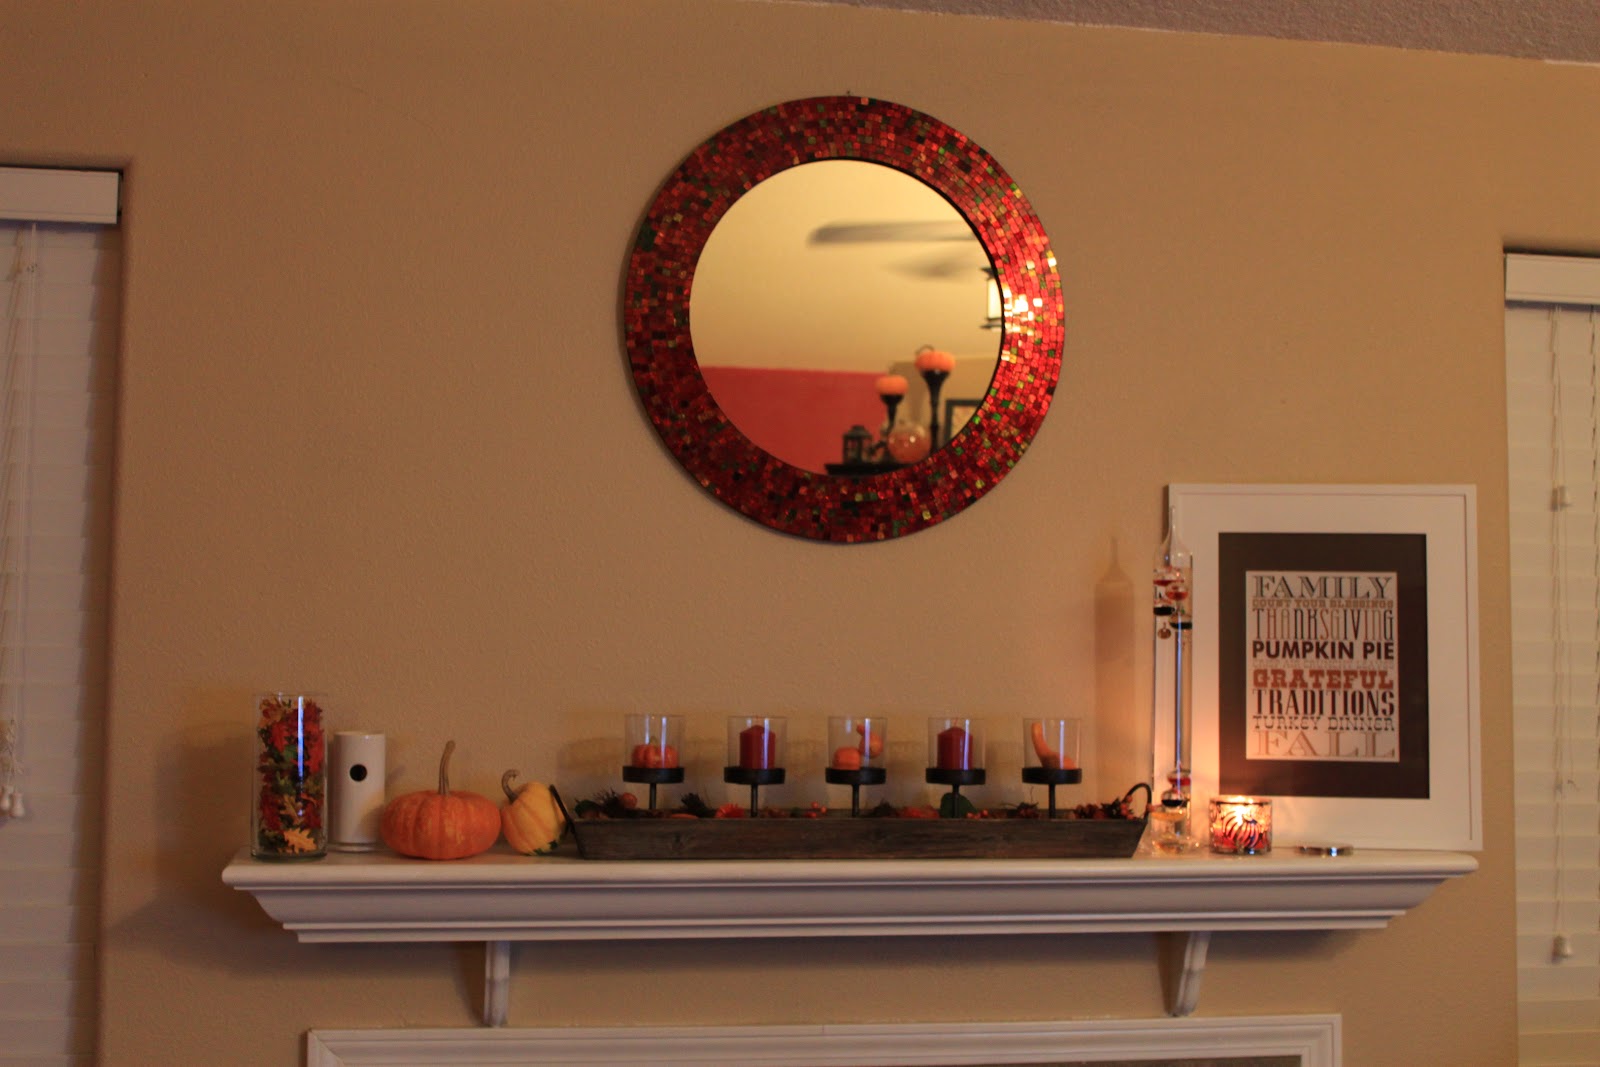
Thanksgiving really snuck up on me this year...and considering this weekend it is my goal to catch up on the last, oh, 4 months of blog posts...this one is going to be right on time!
I didn't do a whole lot of shopping for decor for this season. I was still so sick at the beginning of November {yeah for double ear infections and sinus infections at the SAME time at the age of 28...}. All I really bought was the fake little pumpkins and the mixture that is in the bottom of the candle holder tray...All in all I'm not as happy with my Thanksgiving decorations as I was with my Halloween ones...maybe next year...
above the tv...
The Thanksgiving mantle
Isn't he the CUTEST turkey candle you've ever seen?!?!
Our pumpkins from our Elements Glass Trip.
Jason's pumpkin when there is light behind it...
and when there is not...
Subway Art from the girls at eighteen25
The fall decorations crept into the kitchen...
Labels:
craft,
decor,
fun frames,
holiday,
thanksgiving
Saturday, November 12, 2011
Diaper Cake for baby Oren
One of my very favorite "family members" Stacy is having her second baby, a little boy named Oren, this coming January. She and I lived 2 houses away from each other growing up. Our families sometimes do Thanksgiving together. She really is like my little sister and I love her...okay, enough mushy stuff...on to cute baby stuff!!!
Since Stacy already has an adorable little girl, Crissy, she really wanted some practical baby stuff...mainly breast pads and diapers. My Mom got her the pads - I covered the diapers. But let's face it, wrapping diapers isn't usually that entertaining so I decided to take it up a notch. I've made a few diaper cakes though this one I made in record time - about 10 minutes {thanks for the help Mom}. It was a lovely celebration with family and friends.
What's a cake without a little decoration {in the form of travel size baby related items :)}
Stacy and myself.
And here are a few other pictures from the {cute} day!!
Delicious food
Adorable cake
Cute cupcakes from Battle Ground Bakery.
The beautiful Mom to be!!!
She was seriously excited about the diaper cake!!
Lots of cute boy clothes!!
Labels:
baby shower,
craft,
family,
gift,
stacy
Location:
Battle Ground, WA 98604, USA
Monday, October 31, 2011
Fun Frames ~ BEWARE!!!
I had the same Fun Frames all summer...I always have plans (grand plans) for what I am going to do on my summer vacation and this summer, as in summer's past, I haven't accomplished much!! After my last post about one of my favorite's birthday party...I went on vacation, started school, and was sick from September 30th - oh, last week (which is MID NOVEMBER!!!).
Moving on...
I had a blast decorating (and shopping for decorations) for Halloween this year. I wanted to have decorations for Halloween that were on the brighter side! I decided to mainly use the colors orange, black, purple, lime green, yellow and a few silver spiders :) I think I bought about $30 worth of decorations - I was just too impatient to wait until after Halloween to decorate :)
I had a hard time choosing a word for Halloween. The words that were in the running were: BOO!, EEK!, beware, spooky, ghost. I ended up choosing 'beware' and used the "creepy" font from Microsoft Word.
Moving on...
I had a blast decorating (and shopping for decorations) for Halloween this year. I wanted to have decorations for Halloween that were on the brighter side! I decided to mainly use the colors orange, black, purple, lime green, yellow and a few silver spiders :) I think I bought about $30 worth of decorations - I was just too impatient to wait until after Halloween to decorate :)
I had a hard time choosing a word for Halloween. The words that were in the running were: BOO!, EEK!, beware, spooky, ghost. I ended up choosing 'beware' and used the "creepy" font from Microsoft Word.
The mantel during Halloween.
The standard teddy bear, some tea lights from forever ago, and candy corn*
*candy corn level suspiciously kept getting lower and lower during the month...
I really love this piece. It is from Craft Warehouse. It is SO versatile!
Eyeball & glass bead mixture and silver spiders from Pier 1. Fuzzy balls from CW.
Subway art from the girls at eighteen25!!!
Spiders from Pier 1.
Witch's Hat from CW.
Wicker pumpkin - CW. Purple pumpkin - P1.
Teddy bear from Starbuck's. Pumpkins from CW. I wish I'd gotten a better picture of the glittery candy corn from P1. It is cute!!!
Love it!!! I should have taken pics of the other items...silly me!
Labels:
craft,
decor,
fun frames,
halloween,
holiday
Location:
Washougal, WA, USA
Subscribe to:
Posts (Atom)